2024. 5. 10. 15:56ㆍLinux/CentOS7
DB이중화
이중화는 관리차원에서 항상 중요한 요소다.
그러니 중요 정보가 모여있는 DB의
이중화를 하지 않을 수 없다
먼저 MariaDB가 설치된 CentOS7 2개를 준비해주자
192.168.20.50 - CentOS7
192.168.20.100 - CentOS7
DB마스터 서버 설정
먼저 hostnamectl 명령어로 호스트 이름도 바꿔주자
hostnamectl set-hostname master1
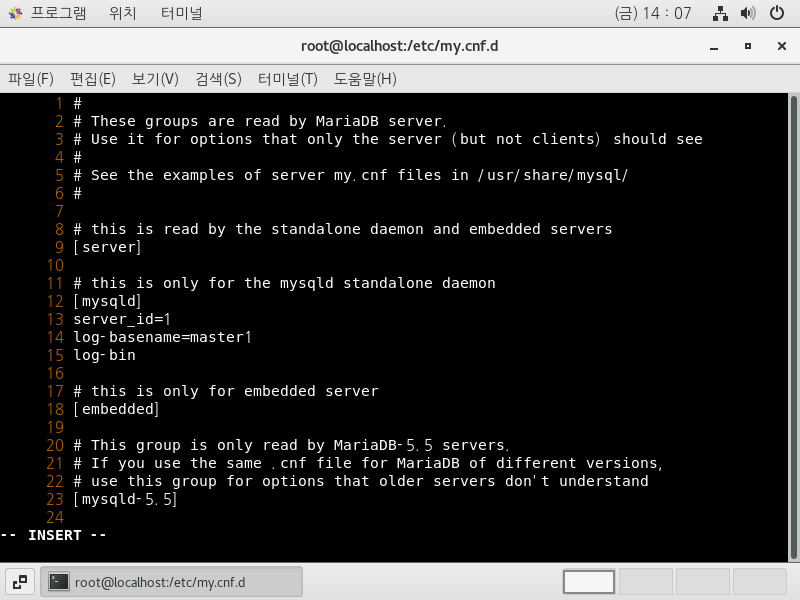
이제 설정 파일에서 마스터 설정을 입력하자
[root@master1 ~]# cd /etc/my.cnf.d/
[root@master1 my.cnf.d]# ll
-rw-r--r--. 1 root root 295  5월  6  2020 client.cnf
-rw-r--r--. 1 root root 232  5월  6  2020 mysql-clients.cnf
-rw-r--r--. 1 root root 744  5월  6  2020 server.cnf

[root@master1 my.cnf.d]# vi server.cnf
----------------------------------vi 편집기--------------------------------
     13 server_id=1
     14 log-basename=master1
     15 log-bin
해당행에 내용 추가 후 저장


[root@master1 my.cnf.d]# systemctl restart mariadb
mariadb 재시작 후 접속해주자
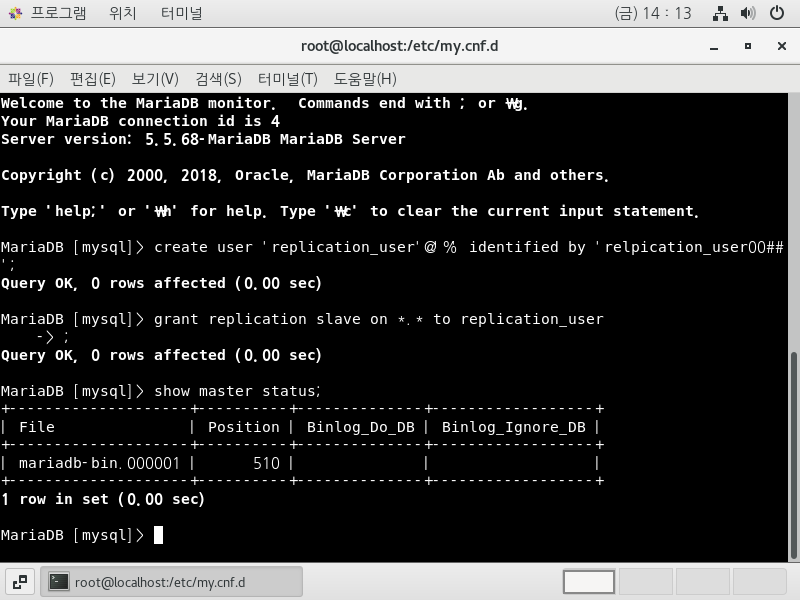
MariaDB [mysql]> create user 'replication_user'@'%' identified by 'replication_user00##';

MariaDB [mysql]> grant replication slave on *.* to replication_user;


MariaDB [mysql]> show master status;
마스터 상태 확인 명령어
+--------------------+----------+--------------+------------------+
| File               | Position | Binlog_Do_DB | Binlog_Ignore_DB |
+--------------------+----------+--------------+------------------+
| mariadb-bin.000001 |      510 |              |                  |
+--------------------+----------+--------------+------------------+
1 row in set (0.00 sec)

file명과 Position을 기억해두자
.
.
마스터 서버의 설정은 끝났다.
DB 슬레이브 서버 설정
슬레이브 서버도 비슷하게 해주면 된다.
마스터 서버처럼 호스트네임을 바꿔주고
[root@localhost my.cnf.d]# hostnamectl set-hostname slave1
[root@localhost ~]# cd /etc/my.cnf.d/
[root@localhost my.cnf.d]# vi server.cnf
--------------------------------vi 편집기-----------------------------
     13 server_id=2
     14 log-bin
     15 log-basename=master1
     16 report-host=slave1
해당행 추가 후 저장

[root@slave1 ~]# systemctl restart mariadb

재시작 후 실행
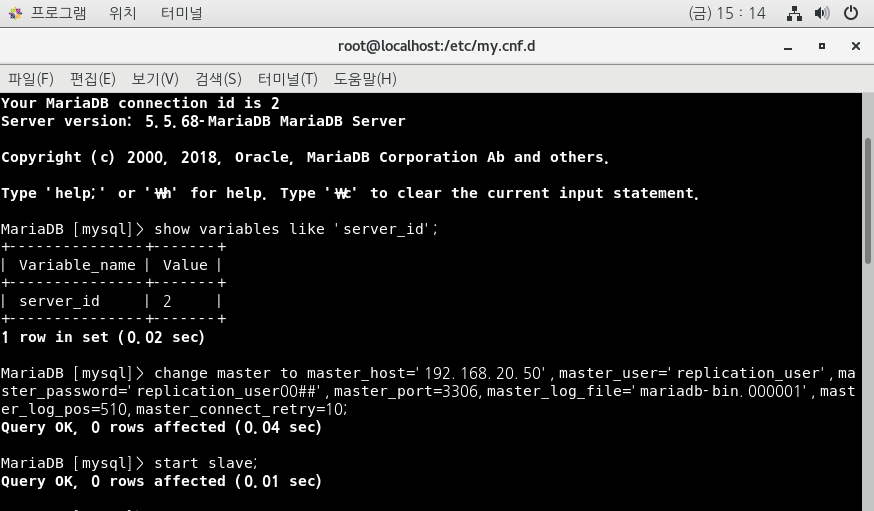
MariaDB [mysql]> show variables like 'server_id';
서버 ID 확인
+---------------+-------+
| Variable_name | Value |
+---------------+-------+
| server_id     | 2     |
+---------------+-------+
1 row in set (0.00 sec)

마스터 슬레이브 연결 명령어
MariaDB [mysql]> change master to master_host='192.168.20.50',master_user='replication_user',master_password='replication_user00##',master_port=3306,master_log_file='mariadb-bin.000001',master_log_pos=510,master_connect_retry=10;
서버 ID지정 및 마스터 서버 IP 계정.비밀번호,포트 등을 지정해주자
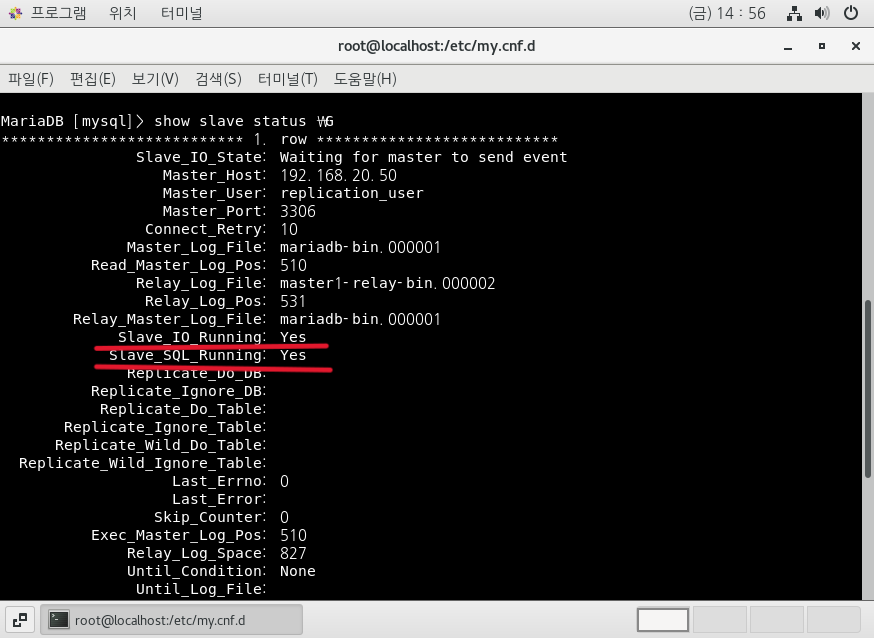
MariaDB [mysql]> start slave;

MariaDB [mysql]> show slave status \G;
슬레이브 서버 상태 확인

MariaDB [mysql]> show slave status \G
*************************** 1. row ***************************
               Slave_IO_State: Waiting for master to send event
                  Master_Host: 192.168.20.50
                  Master_User: replication_user
                  Master_Port: 3306
                Connect_Retry: 10
              Master_Log_File: mariadb-bin.000001
          Read_Master_Log_Pos: 510
               Relay_Log_File: master1-relay-bin.000002
                Relay_Log_Pos: 531
        Relay_Master_Log_File: mariadb-bin.000001
             Slave_IO_Running: Yes
            Slave_SQL_Running: Yes
              Replicate_Do_DB:
          Replicate_Ignore_DB:
           Replicate_Do_Table:
       Replicate_Ignore_Table:
      Replicate_Wild_Do_Table:
  Replicate_Wild_Ignore_Table:
                   Last_Errno: 0
                   Last_Error:
                 Skip_Counter: 0
          Exec_Master_Log_Pos: 510
              Relay_Log_Space: 827
              Until_Condition: None
               Until_Log_File:
                Until_Log_Pos: 0
           Master_SSL_Allowed: No
           Master_SSL_CA_File:
           Master_SSL_CA_Path:
              Master_SSL_Cert:
            Master_SSL_Cipher:
               Master_SSL_Key:
        Seconds_Behind_Master: 0
Master_SSL_Verify_Server_Cert: No
                Last_IO_Errno: 0
                Last_IO_Error:
               Last_SQL_Errno: 0
               Last_SQL_Error:
  Replicate_Ignore_Server_Ids:
             Master_Server_Id: 1
Running 상태가 두개 모두 yes로 뜬다면 성공이다.
이제 master DB서버에서 DB를 생성해보자
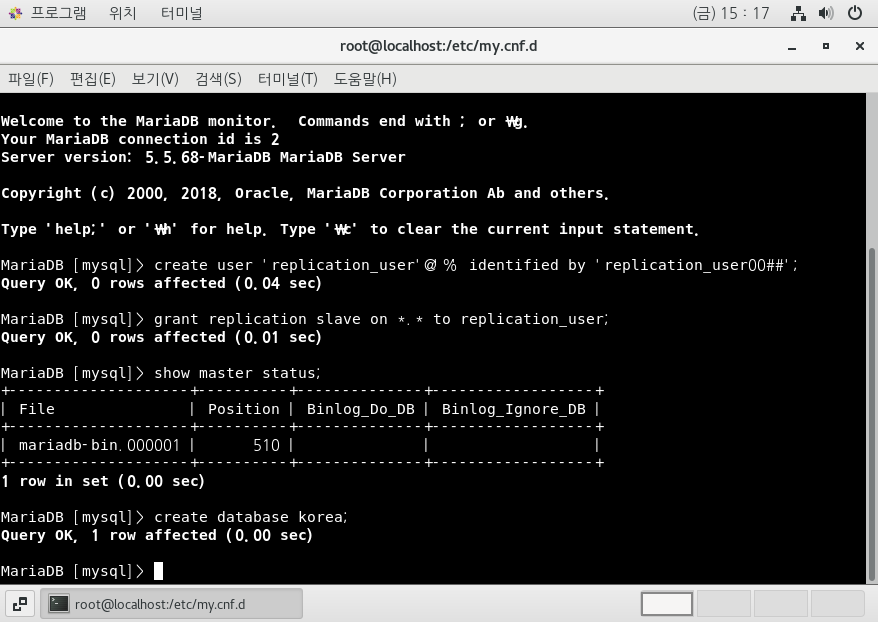
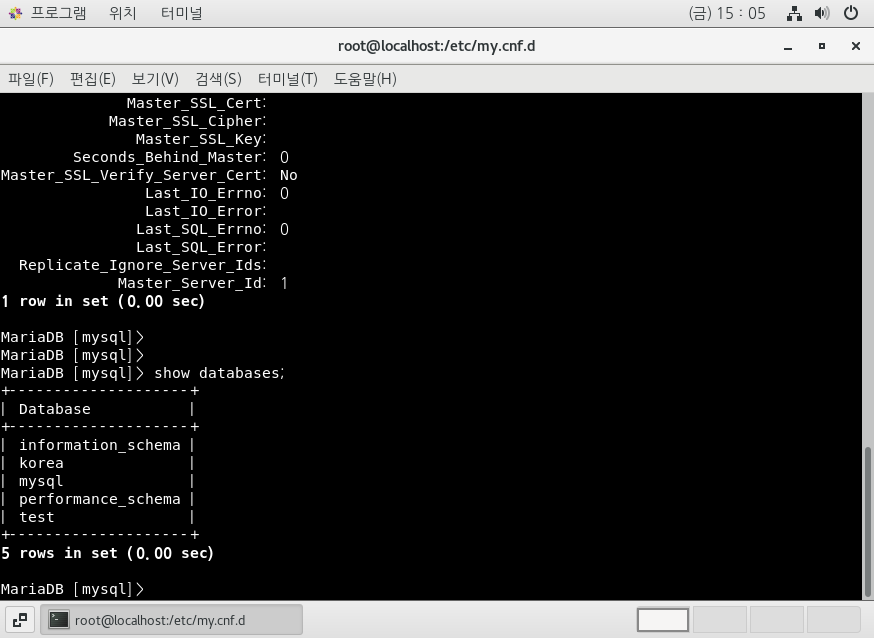
그럼 자동으로 slave 서버에도 DB가 생성된 것을 볼 수 있다!
이중화가 성공했다.
192.168.20.150 서버에도 DB슬레이브 서버를 만들어서
마스터 서버와 연결시켜보자
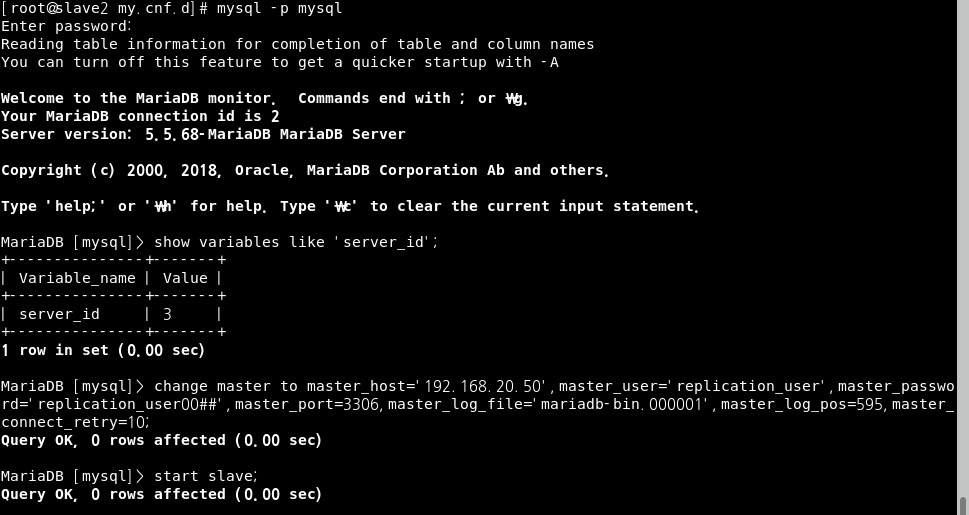

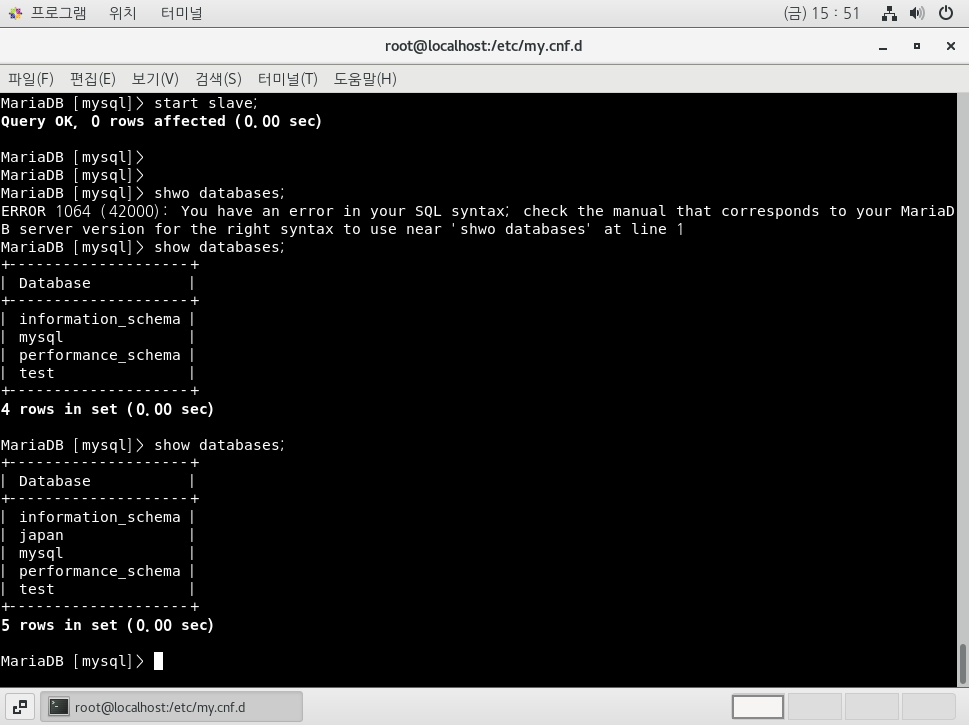
마스터 서버에서 japan 데이터 베이스를 만들고 슬레이브2 서버에서 확인해보니 잘 작동한다.
하지만 보시다시피 이전에 만든 korea 데이터 베이스는 없는걸 볼 수 있는데,
이중화는 이중화 시점부터 동기화하기 시작해
이전 데이터들이 복사되는 것은 아니라는 걸 알아두자
만약 이중화를 삭제하고 싶다면
stop slave; 후
reset slave; 또는 reset slave all; 을 입력해주자!
'Linux > CentOS7' 카테고리의 다른 글
| Linux 31 . PXE 부팅 시스템 (0) | 2024.05.14 |
|---|---|
| Linux 30 . Database 한글 (0) | 2024.05.13 |
| Linux 27. XE로 웹서비스 (0) | 2024.05.07 |
| Linux 26 . php , DB, wordprocess 연결을 script로 자동화하기 (0) | 2024.02.27 |
| Linux 25 . MySql, php, wordpress 구성 (0) | 2024.02.27 |